The Complete Field Guide
The Self-Tape
Setup Guide.
Get it clean. Stop overthinking it. Start acting.
Here's the part nobody tells you
Most self-tapes aren't rejected because of talent — they're rejected because something feels off before the acting even starts. And the frustrating part? Most families never realize this is the reason they're not getting callbacks.
!
Start Here · The Most Important Rule
Always read casting's instructions first.
Every casting office is different. If they ask for something specific, do that, exactly. Everything in this guide is your default setup when no instructions are given.
What's Inside · 14 Setup Rules
01Frame
02Camera & Position
03Lighting
04Sound
05Reader
06Eyeline
07Background
08Wardrobe
09The Slate
10Full Body Shot
11Props
12Editing
13File Labeling
14File Type & Size
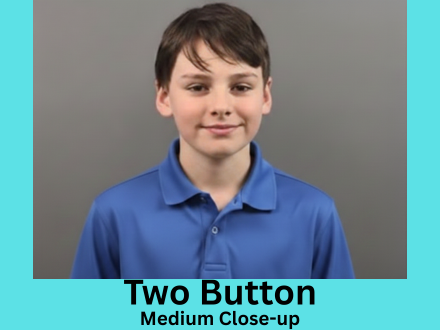
- Frame just above the head to mid-chest
- Keep headroom tight — no floating heads
- Camera horizontal, always
- No vertical video, ever
Too much space above the head and it already looks wrong before your kid says a word.
Medium Close-Up Frame
Tight frame — just above the head to mid-chest. Too wide = no connection. Too tight = no movement.
- Camera 2–3 feet in front of the actor
- Background 2–3 feet behind the actor
- Camera at eye level
- Always stable — tripod or solid surface
Never hold the phone while filming. Ever. Even if you think you're steady — you're not.
Proper Self-Tape Setup
Camera 2–3 ft in front. Backdrop 2–3 ft behind. This creates depth and separation — so your kid doesn't look flat on camera.
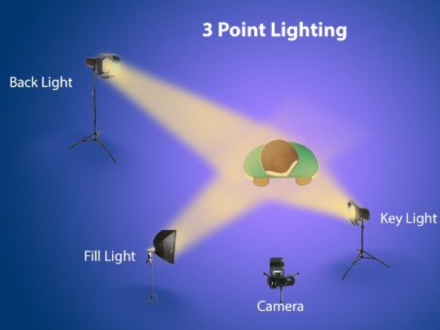
- Main light source behind the camera
- Face clearly lit, no dim zones
- Avoid shadows on the face
- Do NOT stand in front of a window
If your kid looks like they're under interrogation, casting already checked out. If we can't clearly see their eyes — fix this before anything else.
3-Point Lighting, Simplified
Light comes from behind the camera — not behind the actor. If the lighting looks like a YouTube studio, you're not helping the performance. You're distracting from it.
- Quiet indoor room
- No echo — carpet, curtains, soft surfaces help
- Clear, natural voice
- Optional: lapel mic (hidden or nearby)
The Reader Volume Rule
Readers almost always sound louder than the actor because they're sitting closer to the mic. This kills the scene.
- The reader should aim for about half the volume of the actor
The Lapel Mic Fix
The reader is closer to the mic — so they sound louder. Keep the reader at half volume, or clip a simple lapel mic on the actor. Clean audio is the single easiest upgrade most parents skip.
- Must be a real person — never self-read
- Stand just off camera, right next to the lens
- The actor looks at the reader, not the camera
- Reader doesn't "perform" the scene
The reader supports the scene. They don't star in it.
A weak reader doesn't just lower the quality of the tape — it changes your child's performance. You can coach your kid for hours and watch it all collapse because the reader pulled them flat.
- Look slightly off camera — left or right
- Never directly into the lens (unless instructed)
We should feel a real conversation — not a presentation.
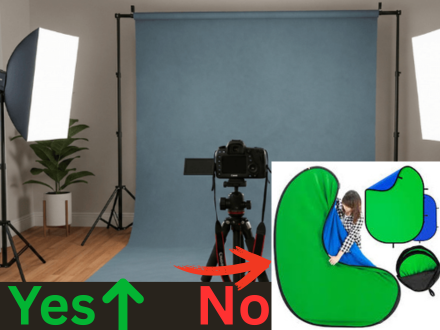
- Plain, neutral wall — white, gray, blue
- Wall, backdrop, or curtain all work
- No furniture, switches, or clutter
- No green or blue screen
If casting notices the background, it's already a problem.
Good vs. Bad Backdrop
Plain wins. Always. Green screens and busy rooms pull focus straight off the performance — which is the opposite of the job.
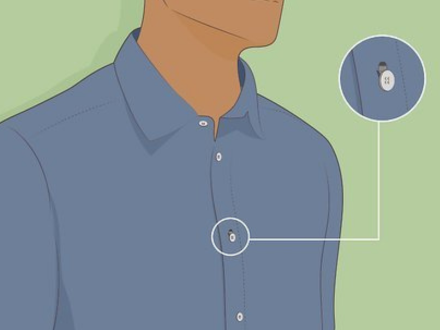
- Suggest the role — don't costume it
- No logos, no loud patterns
Hint the character. Don't dress like Halloween.
A technically "perfect" self-tape that feels flat will lose to an imperfect one that feels alive. Every time.
— The whole point, in one sentence
The Basic Slate Info
Always follow casting's directions first. If they ask for something different, do that.
Slate Tips · This Is Your Edge
Be conversational — not robotic. The slate is the first thing casting sees. Make it count.
- Use personality
- Be relaxed
- Add a small personal detail
- No stiff, monotone recitations
Sample Slate
"Hi, I'm Corey, I'm 13, 5'2, based in LA… and a fun fact about me is I'm obsessed with turtles."
- Film separately from the scene
- Head to toe, fully visible
- Vertical or horizontal both fine
- Don't obsess over framing — just clear visibility
- Usually: don't use them
- If needed, keep it simple — phone, cup, etc.
When in doubt, don't.
Cut These Out
- Mistakes
- Resets
- Coaching
- If requested: combine scenes + slate into one file
Always follow casting instructions exactly. If none given:
- Separate files: FirstLastName_Scene1Take1 · FirstLastName_Slate
- Single file: FirstLastName_RoleName
Wrong labeling = not reviewed. It's that simple. Casting sorts through hundreds of tapes.
- Format: MP4 only
- Size: under 500MB
- Avoid .MOV files
- Use HandBrake to compress if needed
The iPhone Fix · Turn Off HEVC
Settings → Camera → Formats → Most Compatible
The Final Check — read this before you send.
i.
Can we see them clearly?
ii.
Can we hear them clearly?
iii.
Does nothing distract us?
If yes to all three — you're done. Stop adjusting. Start acting.
Want This To Actually Book?
Setup gets you in the game.
The system gets you booked.
Most families try to solve this in pieces — a coach here, a lesson there, a friend reading. That's why it never quite works. This system fixes the whole process.
Here's the part most parents don't realize: your reading is shaping the entire performance — for better or worse. The scene your kid delivers is only as alive as the scene partner they're playing against.
Step 01
Bold Choices
What to play
The version of the scene that actually books, not the safe one.
Step 02
Prep101
Build the performance
Upload the sides, get a full breakdown. Walk in actually prepared.
Step 03
Reader101
Fix the read
A reader that actually reads — not a parent flattening the scene from off-camera.
This is what turns a "good" tape into the one casting remembers.
The Simple Setup Kit
Simple setup that works.
No overthinking required.
You don't need a studio. You need clarity. Here's the exact stack that gets you a clean, professional-looking tape — without turning your living room into a soundstage.
If your setup is wrong, even a great performance can feel flat. Start here, save the creativity for the acting.
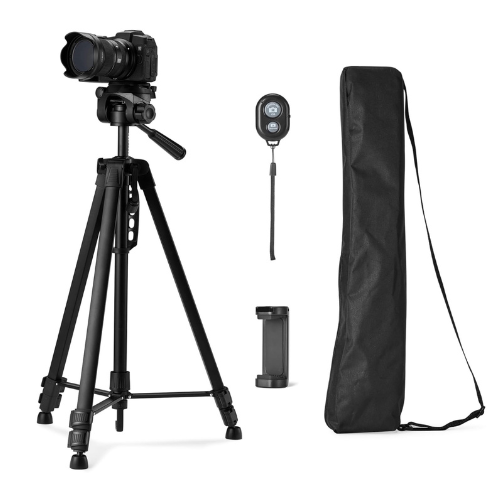
Essential
Tripod
Stable. Eye-level. Non-negotiable. The single most important piece of gear.
Shop on Amazon →
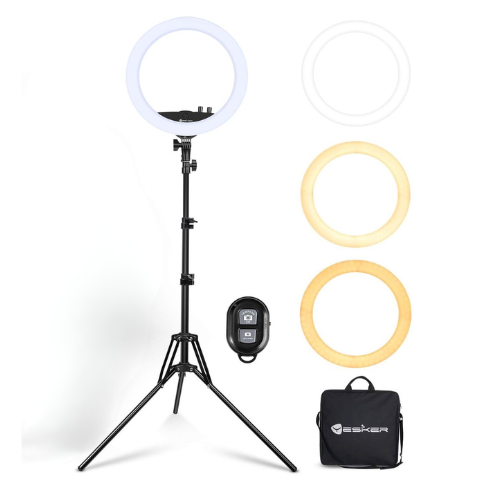
Essential
Ring Light
Face clearly visible, no harsh shadows. Remember to tilt up to avoid alien eyes. Softbox works too — whichever fits the room.
Shop on Amazon →
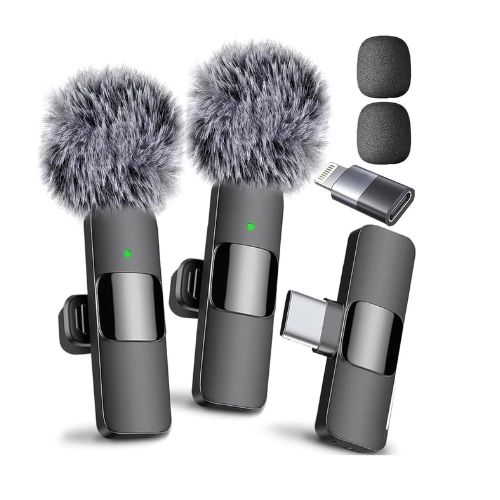
Big Upgrade
Lavalier Mic
Clean audio = watchable performance. iPhone-compatible, clips right onto the actor.
Shop on Amazon →
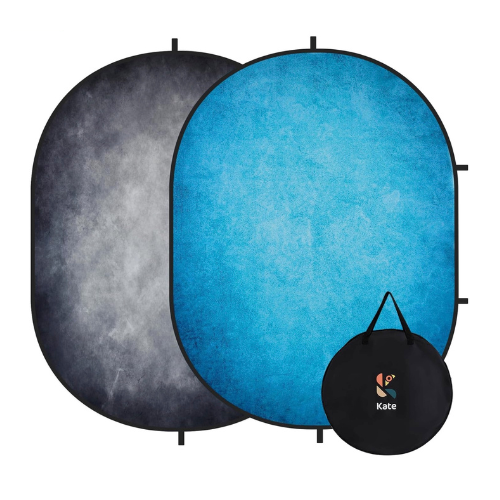
Matters
Neutral Backdrop
Gray or blue. Keeps the eye on your kid — not on your Halloween decorations.
Shop on Amazon →
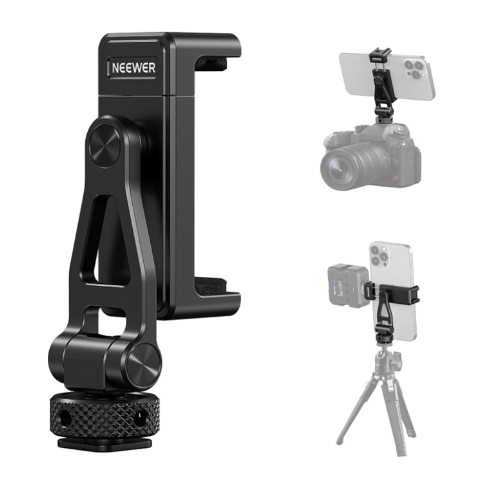
Nice to Have
Phone Mount
Locks the phone to the tripod. Small thing, huge difference in stability.
Shop on Amazon →
A note on the links above: This guide contains Amazon affiliate links, which benefits Child Actor 101. As an Amazon Associate I earn from qualifying purchases — at no extra cost to you.
Your Next Self-Tape
Don't just record. Book.
Start with a custom breakdown of your kid's actual sides. Or get a reader that isn't you.
This guide fixes the setup.
This is what fixes the performance.